Strengthen & Tone | Boot Camp Workout

A question I am frequently asked is, “What do you do for your workouts?”. As a certified personal trainer, I have been blessed with the opportunity to be trained and certified in many different classes/methods of exercise. Through my past experience of working with clients, and my own weight loss journeys (the first in college, the second after giving birth to my daughter), I have created my own tried and true method of strengthening while losing body fat.
My Personal Fitness Journey
What most people don’t realize is that the two go hand in hand. Women, in particular, think that if they lift weights, they are going to get “big”. So before I go any further, let me tell you about my weight loss journey. As a college student, I gained more than just the freshman fifteen. I went from being an athlete to living a pretty sedentary lifestyle and knew I needed to make a change.
I started with running. At first, I would run a 5k daily, then I was running up to six or seven miles a day. As a former swimmer, I am prone to having broad shoulders and build muscle easily. I would not touch a weight for fear of getting “big”.
For several years, this was my method. Cardio but not resistance training. That’s around the time I went through my first personal training certification. After that, I was lifting with clients, teaching strength training classes, and my body started to transform.
I had lost weight running and doing strictly cardio, but as I started to lift more frequently, my body became more defined and strong.
Fast forward, nine years (I can’t believe I am old enough to say that). After having Lilly I had to give up quite a few of the group fitness classes I was teaching. However, I just couldn’t let go of my Boot Camp class.
I gained 48lbs. when I was pregnant with Lilly. That wasn’t baby weight. That was chocolate chip cookie weight. I had a long ways to go after giving birth.
What did I do to lose the baby weight?
You are in luck because I am taking you through an example of my daily Boot Camp workout routine that is what helped me lose that baby (cookie) weight in a healthy way.
Warm-Up:
Don’t let me confuse you, cardio is important. I typically do anywhere between 20-45 minutes of cardio before I teach my Boot Camp class. One of my favorite cardio HIIT workouts can be found here.
About my Boot Camp Workout:
Boot Camp is a full body strength training workout class. We use weight resistance, body weight, and plyometrics to strengthen and tone. The exercises vary daily to add variety and target every muscle group. I typically take my class through five circuits, one or two burnouts, and core exercises to finish.
Circuits:
The circuits consist of 3-4 exercises. We go through each circuit three times.
Burnouts:
Burnouts are what I use as a “finisher” in class. They are an exercise that is repeated for a certain amount of time to fatigue the muscles (depending on the exercise the time ranges from 45-90 seconds). This method burns fat long after a workout is complete.
Equipment Needed:
For most Boot Camp workouts we incorporate the use of barbells, but for those of you who do not have a gym membership, I tried my best to make this workout “at-home friendly”.
- Stepper with Risers (three per side)
- Dumbbells (one heavier set, one lighter set)
- Kettlebell (may also use one dumbbell)
- Mat
So now that I have explained the logistics to you, let’s get started.
Circuit 1 (Watch Video Example Here):
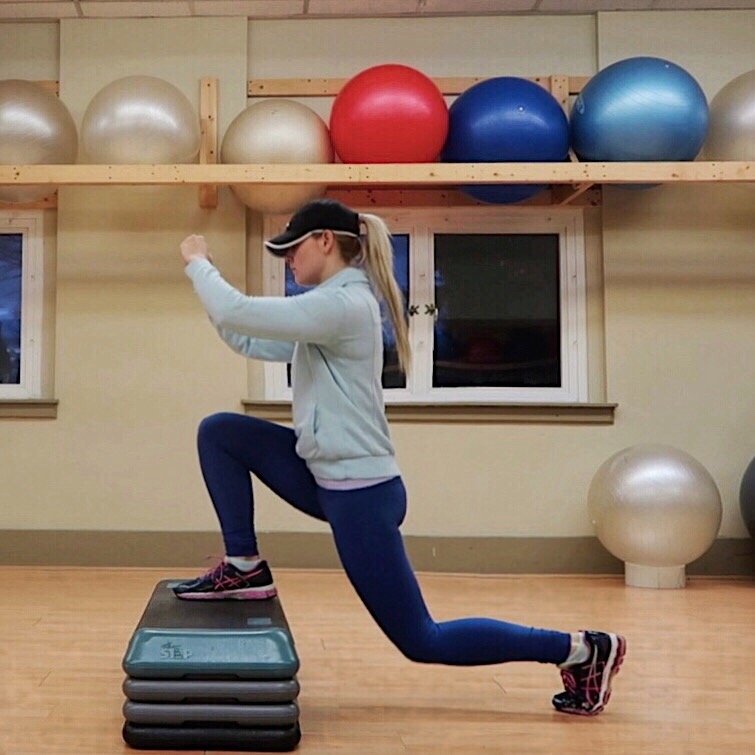
- Up and Overs (15 reps per side): starting in a split squat stance, place your front foot on the long side of the stepper. Be sure to drive through the heel of your front leg and keep your chest up. Both feet should always be facing the same direction.
- Crossovers (15 reps per side): place your front foot on the narrow part of the stepper. Your back leg will start wide. Using the hamstring of your front leg lift your body weight up, and cross your back foot over into a curtsey stance. Stay on the ball of your back foot, and keep your chest up.
- Reverse Stepping Split Squat (15 reps per side): starting in a split squat stance, place your front foot on the long side of the stepper. Your back leg should start at a 90-degree angle. Both feet should be facing the same direction (It’s easy to want to turn the back foot out). Using the hamstring of your front leg, lift your back leg up. Return the back leg back to the starting 90-degree angle.
- Decline Split Squat Jumps (15 reps per side): this time, your back foot will be on the stepper. It will be your “anchor”, and you should stay on the ball of your back foot the entirety of the exercise. You once again, should drive through the heel of your front leg, make sure that your stance is wide enough that your knee is not coming out over your toe when you are in starting position.
- Go through circuit 3 times
Circuit 2 (Watch Video Example Here):
- Tricep Push-ups (15 reps): Using the narrow part of the stepper, place hands on the outer edge. Keeping elbows tucked in and core tight, bring mid-chest down to stepper, and extend elbows back up.
- Bench Row with Press (15 reps per side): If starting on your right side, place left hand and left knee on the stepper and keep core tight. Keeping your arm close to the body, lift your elbow towards the ceiling (hammer grip with dumbbell). When your dumbbell reaches your hip bone, turn the grip and press towards the ceiling.
- Bench Rear Delt Raise (15 reps per side): Starting in the same position as the bench row and a hammer grip with your light dumbbell, make a half-circle with your arm until the dumbbell is parallel with your body. Your chest should still be square with the stepper, and your core should be tight. You should have a very slight bend at your elbow.
- Go through circuit 3 times
Circuit 3 (Watch Video Example Here):
- Elevated Squat with a Hammer Press (15 reps per side): Elevate one leg onto the long part of the stepper. Starting in the bottom part of your squat stance, lift up into a hammer shoulder press.
- Side Stepping Squat with an Upright Row (15 reps per side): Starting with feet together, step out into a squat keeping chest up and kettlebell low. Bring feet back together as you lift the kettlebell up towards your chin (elbows pointed out). Then step out into a squat leading with the opposite foot.
- Kettlebell Swings (15 reps): Make sure that your toes are pointed out slightly and that you are using your legs to lift the kettlebell into a delt raise. Keep back flat and core tight as you come down.
- Go through circuit 3 times
Circuit 4 (Watch Video Example Here):
- Alternating Military Press (15 reps per side): Keep arm you are not working up in a stationary “top part” of the movement, while you complete two presses on the opposite arm. Alternate sides.
- Half Circles (15 reps): Starting with a slightly bent elbow and a hammer grip, use your shoulder to lift arms above the head. The position of your arms or weights should never change, they are just lifted and lowered by using your shoulders.
- V-Raises (15 reps): This is a combination of a lateral and delt raise. You are the center of the “V”. You dumbbells start in a hammer grip, keeping arms straight and core tight, slowly lift and lower arms.
- Go through circuit 3 times
Burnout (Watch Video Example Here):
- This burnout is for 90-seconds. Your goal is to do as many repetitions of this exercise as you can (with good form) in the 90-seconds. Your muscles should feel fatigued. This burnout targets biceps, shoulders, and triceps. Start with a hammer bicep curl, transition into a hammer shoulder press, and finish with tricep extensions. Slowly bring the movement back down, isolating each muscle group as you do.
Circuit 5 (Watch Video Example Here):
- My professional advice to you is to always complete core last. Weight training requires the recruitment and stability of your core throughout the workout. If you fatigue your core first, you have a greater chance of injuring yourself throughout your workout.
- Oblique Twist Knee-Ins (15 reps per side): I am not a fan of the typical crunch. I typically focus on elongating movements that target abs and obliques simultaneously. This exercise does just that. Starting in C-shape position. Bring arms down diagonally at each side, twisting the obliques slightly. Follow the twists by bringing each knee towards your chest.
- Slow Bicycles (15 reps per side): This is my absolute favorite core exercise because it is a stability movement, works abs, and obliques, all while elongating your core. Hold the extended or bottom part of the movement for 3-seconds before switching sides.
- Single-Leg Reverse Crunches (15 reps per side): This is a great exercise for any postpartum moms who are dealing with diastasis recti. It focuses on bringing the navel to spine and bringing those separated abdominal muscles back together. Your goal should be to keep the 90-degree angle of your legs throughout the entirety of the exercise. It also is a SLOW movement.
- Go through circuit 3 times
I hope you find this workout inspiring and fun! If you give it a try, I’d love to hear your thoughts. Please feel free to message me or comment on this post with any questions you might have!
Let’s make 2018 the year we conquer our fitness goals!
xoxo,
Kalyn


